|
|
HISTORICAL MINIATURES BY GEORGE GRASSE |
|
|
|
HISTORICAL MINIATURES BY GEORGE GRASSE |
|
|
ALBATROS W.4 MN.1115, Oberflugmeister Erich Kaestner, Seeflug Station (SFS) Zeebrugge, 1917 |
by George Grasse
GAVIA 1:48 SCALE MULTI-MEDIA KIT BUILT FROM GV0109 ALBATROS W.4
|
GAVIA
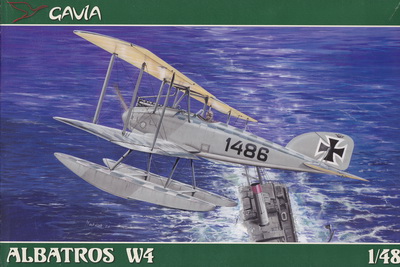
GV0109 ALBATROS W.4 BOX ART
|
 |
|
ALBATROS W.4 3-VIEW
|
.jpg) |
| This 3-view drawing taken from Albatros Productions' Windsock Mini Datafile N.1 drawn by I R Stair. The Albatros W.4 was designed specifically for naval station air defense and it was based entirely on the land-based Albatros D.II. Early versions had the "ear radiators" but these were quickly abandoned in favor of wing aerfoil radiatiors. The drawings above show the early version. |
| THE MODEL TO BE BUILT |
.jpg) |
| Albatros D.V, D.4409/17 flown by Ltn Paul Baumer of Jasta 5, Boistrancourt, January 1918. Profile by Ronny Bar from his work German Fighters of the Great War, page 207, Aeronaut Books. |
.jpg)
.jpg) |
| This photo of Vzfw Erich Kaestner and his Albatros W.4 MN.1115 is courtesy of Das Propellerblatt, Nummer 26, Winter 1009, pg III/929. Oberflugmeister Kastner in a later photo with his dog. Kastner was assigned to the Zeebrugge Naval Air Station from 30 November 1916 to 21 June 1917 and scored three aerial victories. |
|
CONSTRUCTION PHOTO No.1
|
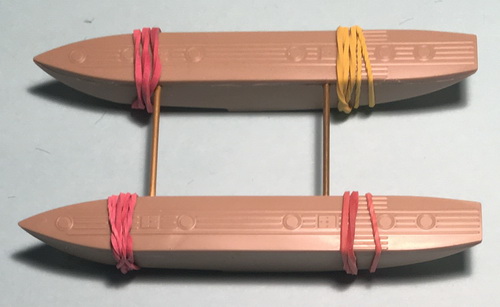 |
| The beginning is work on the floats. I opted to substitute the frail plastic pieces that join the two floats with hefty brass rod. Then, I glued the float tops and used rubber bands to secure them until dry. |
|
CONSTRUCTION PHOTO No.2
|
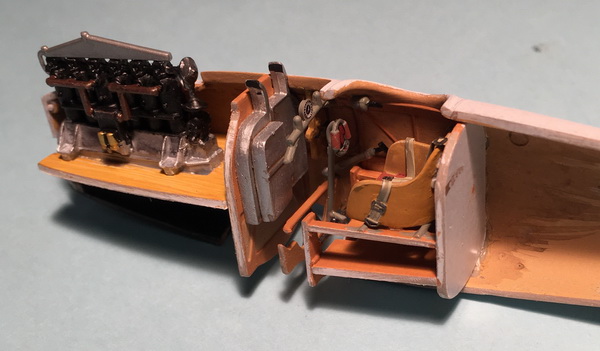 |
| Building up the interior gets easier as you build more Albatros D aircraft. The Albatros W.4 is based on the land version Albatros D.II. The interior wood was painted in three different Vallejo Model Color paints: 912 Tan Yellow, 929 Light Brown, and 824 Orange Ochre. All of these furfaces were then stained with a thin mixture of 872 Chocolate Brown. Interior components were either 716 Semi-Matte Aluminum, Gray-Green mix, or semi-gloss black. |
|
CONSTRUCTION PHOTO No.3
|
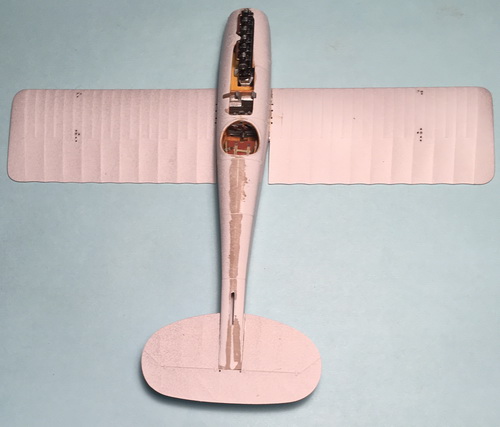 |
| Not much to report here: fuselage halves joined and mildly sanded, lower wing glued in place, and horizontal tail unit glued in place. |
|
CONSTRUCTION PHOTO No.4
|
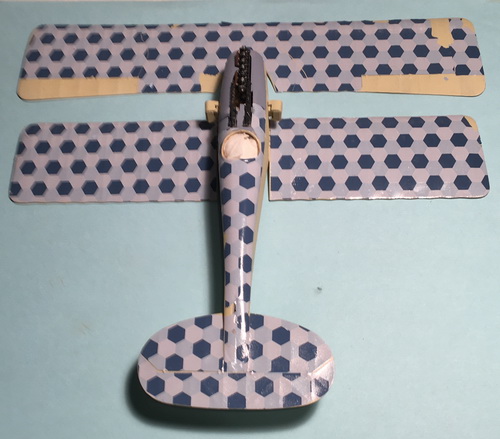 |
| The naval lozenge decals from the kit were used as shown above. As old as this kit is, the decals held up better than expected. In fact, I thought much worse would happen. The decals are quite thin and slight pulls will cause a tear. There are three small naval lozenge decals that are included for repairs. The aileron decals simply have yet to be applied. |
|
CONSTRUCTION PHOTO No.5a
& 5b
|
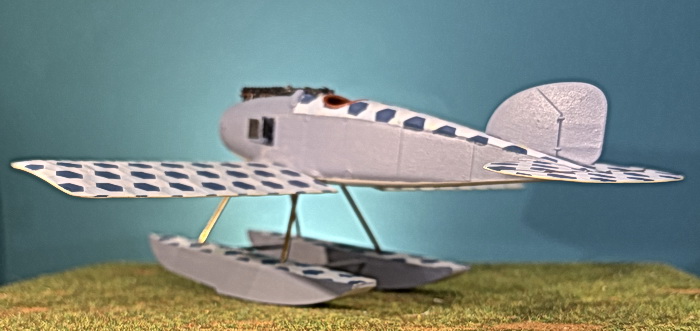 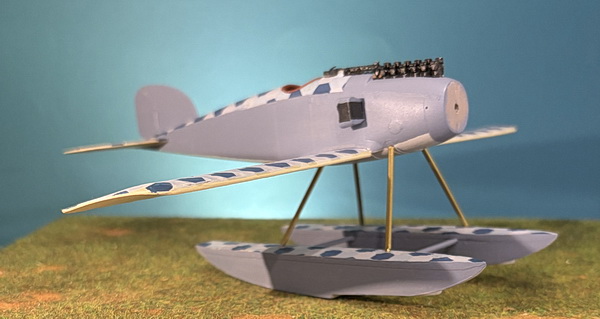 |
| The four float struts were made from 1.5mm brass tube supported by brass rod. I used the kit's plastic struts and drawings to get exact measurements. The rear struts are shorter than the front struts. |
|
CONSTRUCTION PHOTO No.6a
& 6b
|
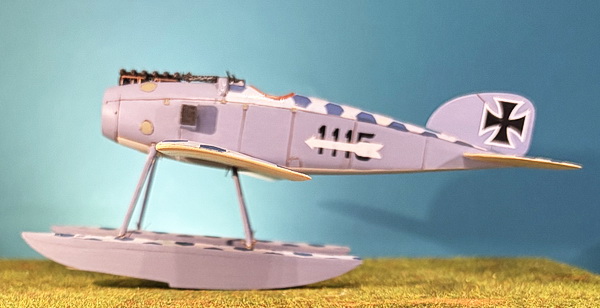 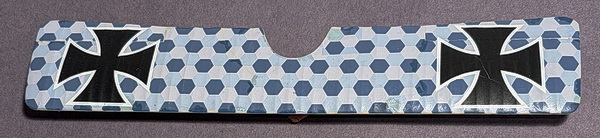 |
| At this stage, I painted in the seam lines using dilluted Vallejo 872 Chocolate Brown. I followed up with touchup work using my Vallejo mix of the side color which I termed as German Naval Blue-Grey. The float struts were also painted in this color. Fuselage access doors were painted in my Vallejo mix of Grey-Green. One coat of Vallejo Acrylic Satin Varnish was oversprayed in preparation for decal application. I was able to create the '1115' marine number from Gavia's decal sheet, there being enough of '1' and the '5'. I'm not sure where I got the white arrow, probably from some long-ago left-over kit decal sheet. The iron crosses are from Gavia's kit but are somewhat delicate and care had to be taken to minimize damage. |
|
CONSTRUCTION PHOTO
No.7
|
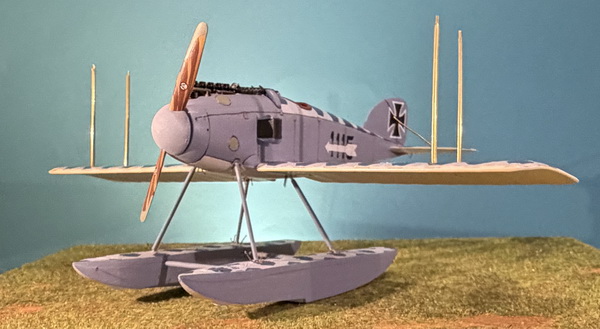 |
| The Propeller was hand-painted in two colors and then "rubbed" with six shades of colored pencils. The tips were painted in green-grey. Decals were added from the kit's decal sheet. Tail struts were made from a single length of old remaining stock of brass 'Strutz'. Wing struts are brass tube with brass rod inserts gently flattened. |
|
CONSTRUCTION PHOTO
No.8
|
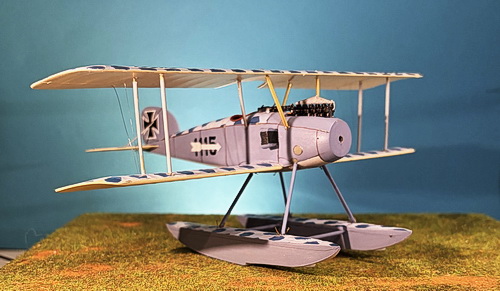 |
| The fuselage struts were added and the dry run of setting the top wing took several iterations until all were secured and the correct alignment was achieved. The only rigging so far is for the ailerons on each side. Note that the water expansiion tank has been affixed to the top of the engine. |
|
CONSTRUCTION PHOTO
No.9
|
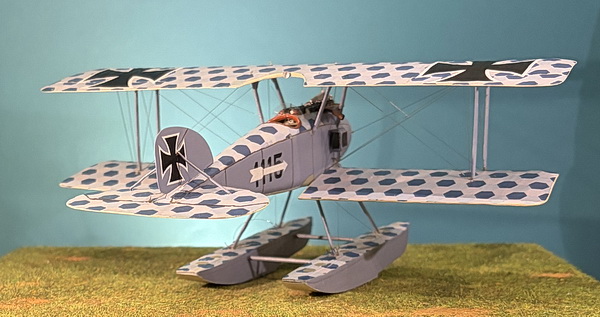 |
| Wing rigging is complete. I started rigging using .006 MFT with the fuselage lines. Two rigging lines are noted at the top of each fuselage strut. One goes straight done through the wing close to the fuselage and the other goes to the bottom of wing strut. In all, that accounts for eight wires. Next were the wires from the top of the wing struts to the holes close to the fuselage. Last in this series are the cross wires between the outside struts. There is some rigging activity on the floats but that will be discussed in the panel #11. |
|
CONSTRUCTION PHOTO
No.10
|
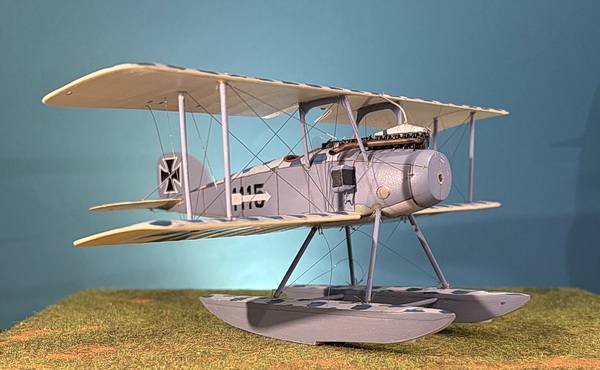 |
| This photo shows the addition of the radiator overflow water line and the exhaust. Barely visible is the addition of a water line from the bottom of each side radiator to its entry into the fuselage side. Some work on the float rigging is visible. |
|
CONSTRUCTION PHOTO
No.11
|
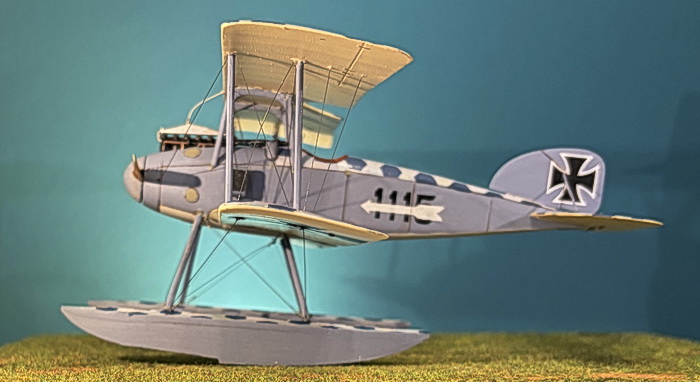 |
| This view and some of the following photos will show additions since the completion of the wing rigging in photo #10 above. This view shows the final rigging of the floats which used Eduard turnbuckles barely visible. |
|
CONSTRUCTION PHOTO
No.12
|
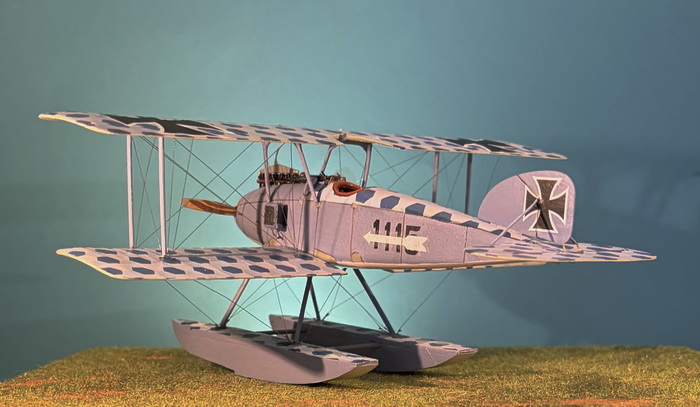 |
| This left rear view shows all of the completed rigging for the wings and floats. I used .006 charcoal MFT. barely visible is the windscreen. The backside of the propeller shows the hand-painted laminations using Vallejo 914 Green Ochre for the light color and Vallejo 984 Flat Brown for the dark color. In addition, I used seveal colored pencils to fub in additional effect. |
|
CONSTRUCTION PHOTO
No.13
|
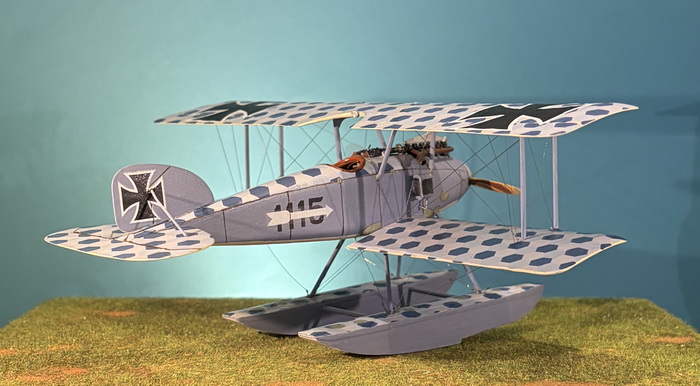 |
| Above the cockpit in the recessed center of the top wing is a scrap piece of plastic painted in Vallejo 707 Chrome to represent the rear-view mirror. The horizontal stabilizer is reinforced with brass rod. All metal plates and access doors are painted in gray-green. |
|
CONSTRUCTION PHOTO
No.14
|
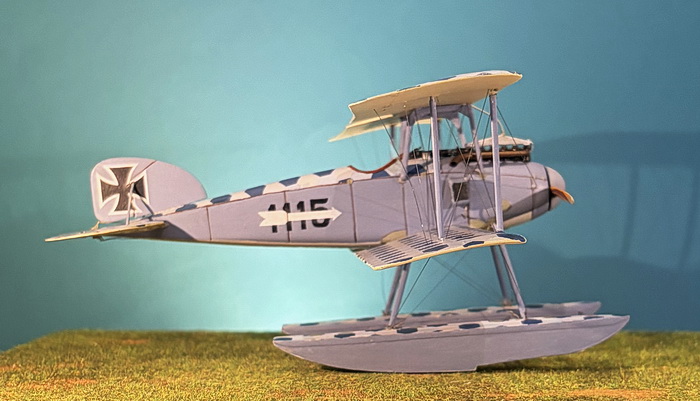 |
| Th3 exhaust pipe is painted in my mix of copper and black. |
|
CONSTRUCTION PHOTO
No.15
|
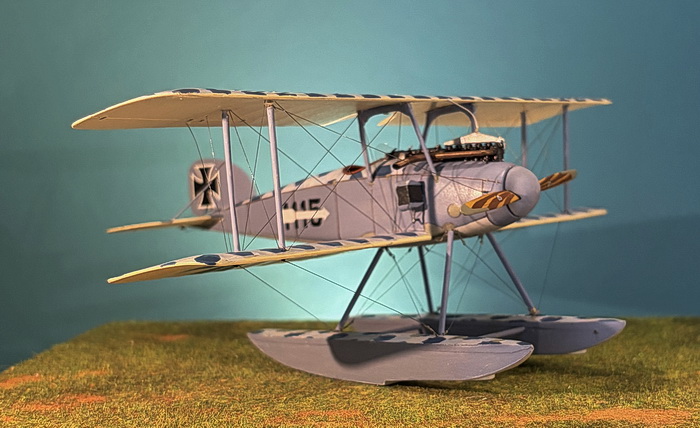 |
| This view shows the propeller which is tipped in brass and primed in gray-green. The propeller decal is from LF Models decal sheet. Just barely visible on the front inside of each float is a small mooring eyelet (the black dot). |
|
CONSTRUCTION PHOTO
No.16
|
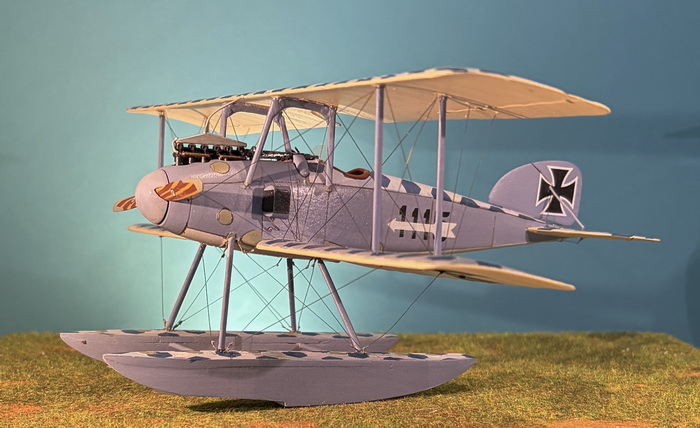 |
| More of the propeller detail is visible. The mooring eyelet on the right float is visible. |
|
CONSTRUCTION PHOTO
No.17
|
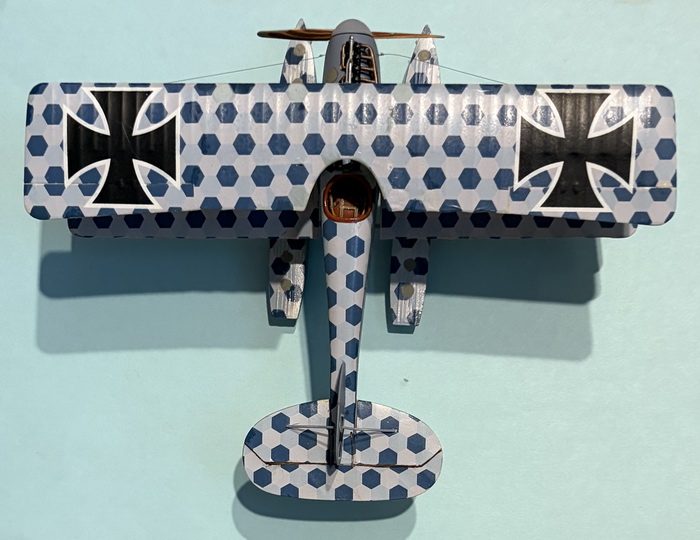 |
| Notes on German Naval Camouflage and colors used on this model |
Bibliography:
Gray, Peter and Owen Thetford. German Aircraft of the First World War. London: Putnam & Company Limited, 1960.
Grosz, Peter. Albatros W4, Windsock Mini Datafile 1. Berkhampstead, UK: Albatros Productions, 1995.
Greer, Don. Albatros Fighters in Action. Carrollton, Texas. Squadron/Signal Publications, 1981.
Lamberton, W. M., Compiler, and E. F. Cheesman, Editor. Fighter Aircraft of the 1914-1918 War. Los Angeles, CA: Aero Publishers, 1962.
Schmeelke, Michael. Zeebrugge Naval Air Station Flanders I, 1914-1918. Aeronaut, 2018.
GO TO?
24 June 2026
