|
|
HISTORICAL MINIATURES BY GEORGE GRASSE WORLD WAR 1 AIRCRAFT IN 1:48 SCALE |
|
|
|
HISTORICAL MINIATURES BY GEORGE GRASSE WORLD WAR 1 AIRCRAFT IN 1:48 SCALE |
|
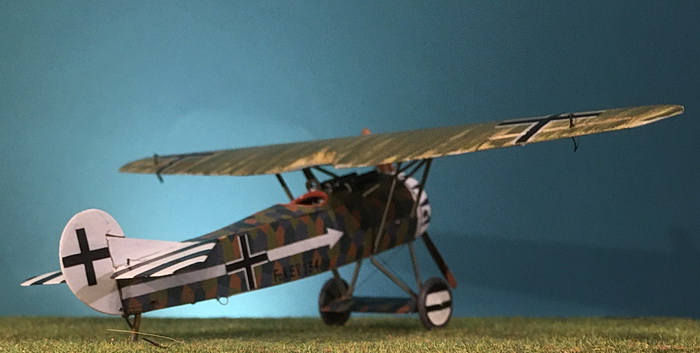
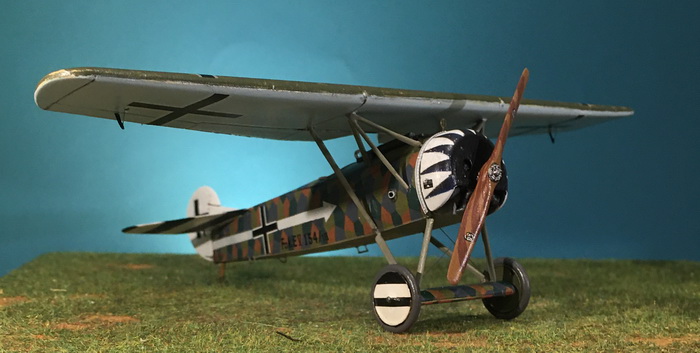
FOKKER E.V 154/18 of Jasta 6, 1918
by George Grasse
DML 1:48 SCALE INJECTION MOLDED KIT DM5907 FOKKER E.V

|
DML DM5907 BOX ART
|
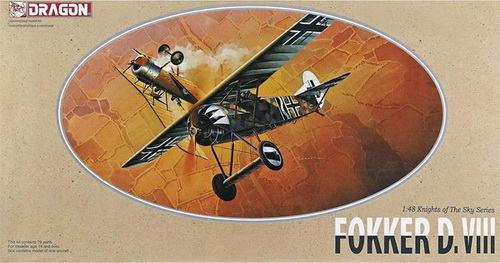 This box top reproduction should have the 'DML' logo in the upper left-hand corner. The box I have is too large for my scanner so I 'borrowed' images from the web. |
|
FOKKER E.V/D.VIII THREE-VIEW DRAWING
|
.png) |
| This 3-view drawing is credited to J. D. Carrick or F. Yeoman and appeared in Fighter Aircraft of the 1914-1918 War compiled by W. M. Lamberton and published by Harleyford Publications Limited, page 123. Other sources for detailed drawings are listed in the bibliograpy below. |
| The Fokker E.V to be Built |
%20Jasta%206%20(Ge%20WW1%20Fighters%20v.2,%20Bar,%20pg.266).jpg) |
|
The model to be built
is Fokker E.V 154/18 flown by Ltn Paul Wenzel of Jasta 6, August 1918. The profile above was created by
Ronny Bar from his book German Fighters of the Great War,
Volume 2, page 266 (see bibliography below). It is not known if Ltn Paul Wenzel flew Fokker E.V 154/18. My logic for selecting him relates to research of Jasta 6 pilots who scored victories in August 1918 as listed in Above the Lines by Norman Franks et al page 32. I found three pilots who scored at least one victory in August 1918, the high period of the Fokker E.V and they are U. Neckel, R. Wenzl, and P Wenzel. I knew that Ltn Richard Wenzl flew Fokker E.V 153/18. I discarded U. Neckel who became an exceptionally high-scoring ace flying the Fokker D.VII. That left Ltn Paul Wenzel who scored all of his 12 victories in Jasta 6. That's the logic I followed to get a pilot assigned to this Fokker E.V 154/18. |
| CONSTRUCTION PHOTO #1 |
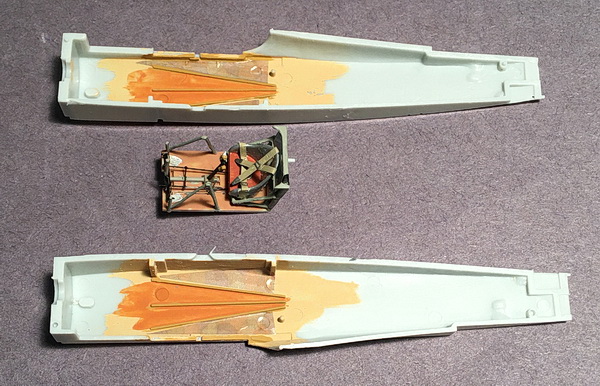 |
| The starting place for this Dragon/DML kit is the fuselage interior. Only what can eventually be seen when finished is installed and painted. The orange-brown color represents the plywood interior surrounded by small-cut decals from Aviattic's reversed 4-color lozenge decals. |
| CONSTRUCTION PHOTO #2 |
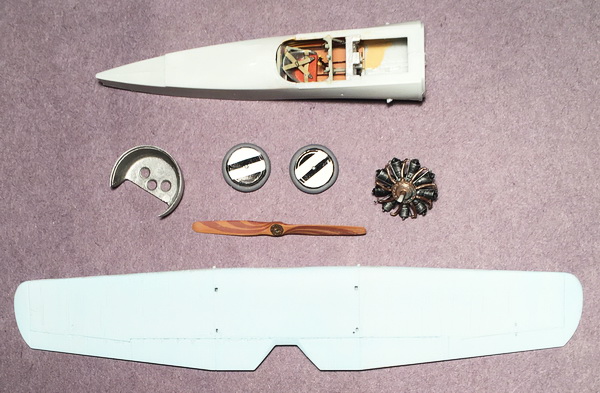 |
| The cockpit sub-assembly is glued into one side of the fuselage half and then the two halves of the fuselage are glued together. Additional parts added after joining the halves are the ammunition box and the front cross bar with gauge attached. Additional parts prepared as shown: inside of cowling (aluminum), wheels (2), rotary engine, propeller, and underside of wing painted light sky blue. |
| CONSTRUCTION PHOTO #3 |
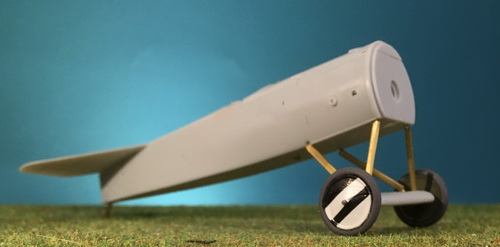 |
| The landing gear is done next. Kit struts are discarded and replaced with brass tube and rod. The landing gear wing was retained but the axle nubs were removed and drilled out to take a replacement brass road. Wheels are painted on the inside with "Fokker Green" and the outside are covered with Peddinghaus Fokker E.V wheel cover decals |
| CONSTRUCTION PHOTO #4 |
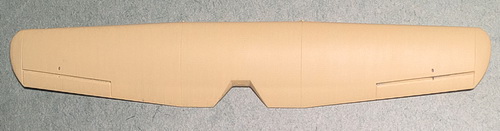 |
| This is the finished wing topside inh two coats of Vallejo 847 Dark Sand representing the finishes plywood wing covering over which the Fokker green "streaking" will by applied. |
| CONSTRUCTION PHOTO #5 |
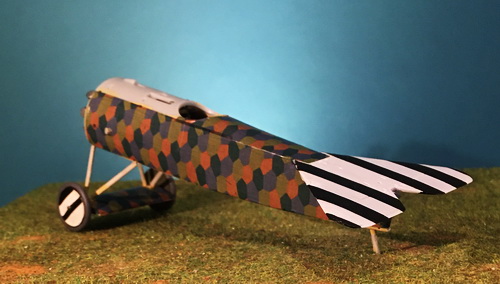 |
| Returning to the fuselage: I first painted the horizontal tail unit in Vallejo 951 White (two coats). Peddinghaus 1:48 scale decals for the tail were applied. However, these were made for the Eduard E.V and proved to be slightly undersized. I used Vallejo 950 Black to paint in the void and then re-painted all of the stripes including the underside. I used Aviattic's 4-color (fresh) lozenge decals, as shown for the top and sides of the fuselage and landing gear wing and used the proper lighter shade for the fuselage underside and landing gear underside. |
| CONSTRUCTION PHOTO #6 and #7 |
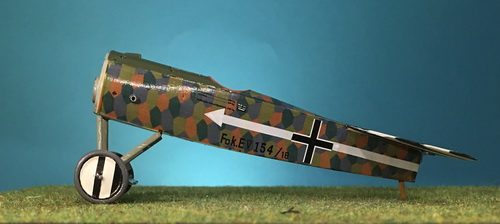 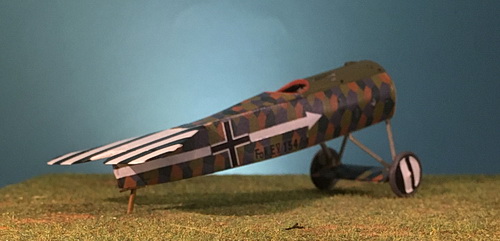 |
| Decal application to the fuselage is preceded by a coat of polyurethane. Decals applied are 1) the weight table; 2) the serial number (taken from the Peddinghaus decal sheet; and 3) the cross insignia (taken from my decal stash. The white arrow personal insignia was made from a plain white decal sheet cut to size in three pieces. A second coat of polyurethane was applied over the decals. |
| CONSTRUCTION PHOTO #8 and #9 |
  |
|
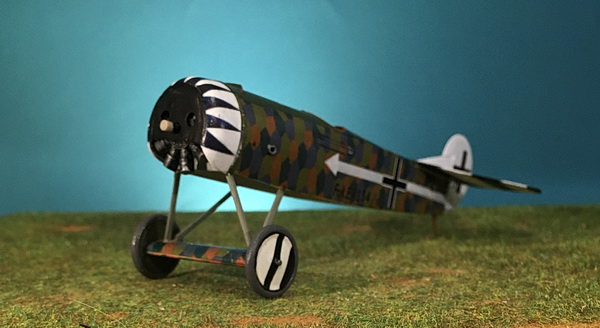
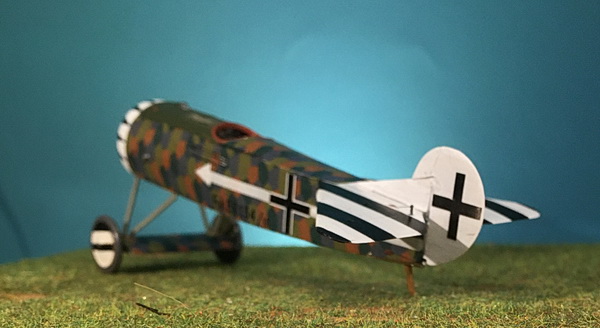
Some time before I started on the cowling and tail unit rigging,
I had pre-painted fin and rudder and applied the cross decals.
So, before sarting on the cowling, I glued the two pieces in place.
Photo #8 (top) shows the application of home-made decals to white cowling. Each black triangle was set in place individualy. When dryed, the white and black portions were touched-up and the face of cowling was painted black. While working on the cowling, I addressed the rigging of the tail unit, photo #9 (below). Eduard control horns were super-glued to pre-drilled holes. When dry, .006 MFT was glued into the fuselage openings first. When dry, the rigging lines were inserted into and through the control horns, pulled taut, and super-glued. When dry, the excess was carefully snipped off. |
| CONSTRUCTION PHOTO #10 |
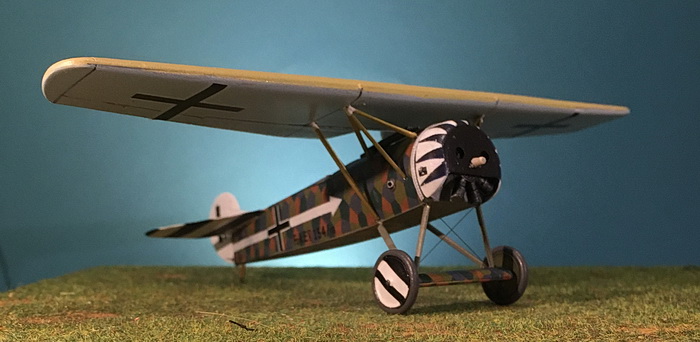 |
| The wing struts are all hand-made from brass tube and rod. I started with the two main struts on each side, one a long strut and the front strut much shorter. These where dry-fitted and then glued in place. The wing was glued to these four struts. The two reinforcing struts to the front and back of the front main strut were then prepared and installed. A touch of putty was applied to smooth things up. |
| CONSTRUCTION PHOTO #11 |
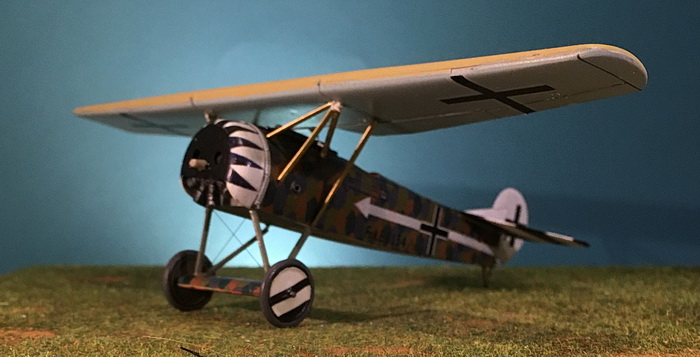 |
| This frontal left-side view shows the wing struts from a different angle. The kit's wing struts were on a PE sheet being quite flat and unrealistic. However, I used them to measure my own brass tube versions which made wing attachment fairly straight forward. The cowling strap between the fuselage and the cowling proper was taken from Quninta Studio's Fokker E.V/D.VIII accessory set. The forward edge of the wing reveals the Vallejo 847 Dark Sand finish representing the plywood-covered wing over which "Fokker streaking" will be applied. |
| CONSTRUCTION PHOTO #12 |
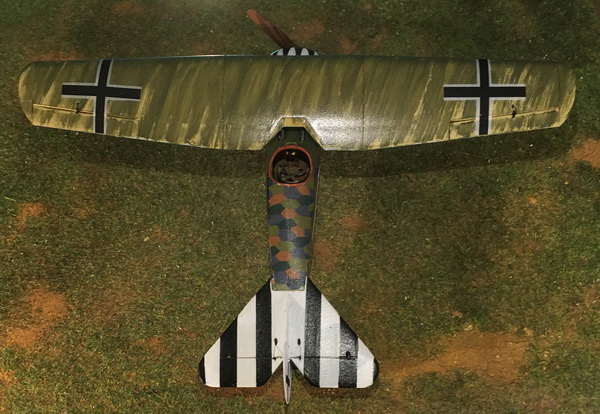 |
| The top surface of the wing has been "steaked". There are a couple of reasons for this type of camouflage application: 1) it was the known practice applied to the Fokker Dr.I but over clear doped linen, not wood; 2) the plywood covering ruled out the application of pre-printed lozenge fabric; 3) the practice of painting multi-colored camouflage colors was not suitable. |
| CONSTRUCTION PHOTO #13 |
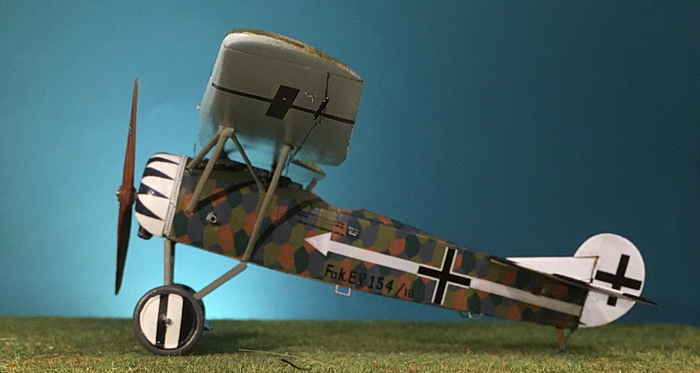 |
| This finished photo highlights the following "last-minute" additions: 1) the forward ring gunsight is barely visible just behind the cowling strap; 2) the foot step; 3) the hand grabs just behind the fuselage cross on the fuselage bottom; 4) the aileron horns, top and underside. |
| CONSTRUCTION PHOTO #14 |
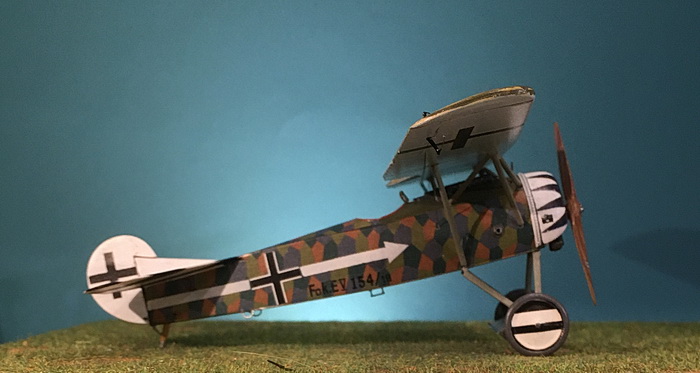 |
| A better view of: 1) the rear fuselage hand grabs; 2) the foot step; 3) the windscreen; 4) the manufacturer's specification plate on the lower right side of the cowling; 5) the gunsight. |
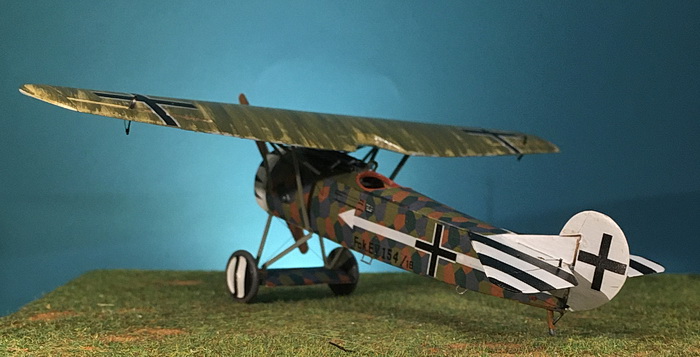
| CONSTRUCTION PHOTO #15 |
 |
| CONSTRUCTION PHOTO #16 |
 |
| CONSTRUCTION PHOTO #17 |
 |
| CONSTRUCTION PHOTO #18 |
 |
Bibliography:
Bar, Ronny. Ronny Bar Profiles, German Fighters of the Great War, Volume 2 (Fokker E.V pages 263-270). Horncastle, UK: Tempest an imprint of Morton's Books. ISBN: 9781911704096.
Gray, Peter and Owen Thetford. German Aircraft of the First World War, scale drawings by George Haddow. London: Putnam & Company Limited, 1962.
Grosz, P. M. Fokker D.VIII - Windsock Datafile No.25. Berkhamsted, UK: Albatros Productions Ltd, 2001 (third edition).
Herris, Jack and Jorn Leckscheid. Fokker Aircraft of WWI, Volume 5: 1918 Designs (Fokker D.VII and vairants and E.V/D.VIII). The Internet:Aeronaut Books, 2021. ISBN: 9781953201614.
Lamberton, W. M., Compiler, and E. F. Cheesman, Editor. Fighter Aircraft of the 1914-1918 War. Los Angeles, CA: Aero Publishers, 1962.
| HISTORICAL MINIATURES MILITARY MINIATURES |
| NAVIGATE TO OTHER PAGES |
| TOP OF PAGE |
| COPYRIGHT |
23 December 2025
